Showing posts with label Seasonal. Show all posts

Sunday, December 17, 2017

A Little Bit of Christmas


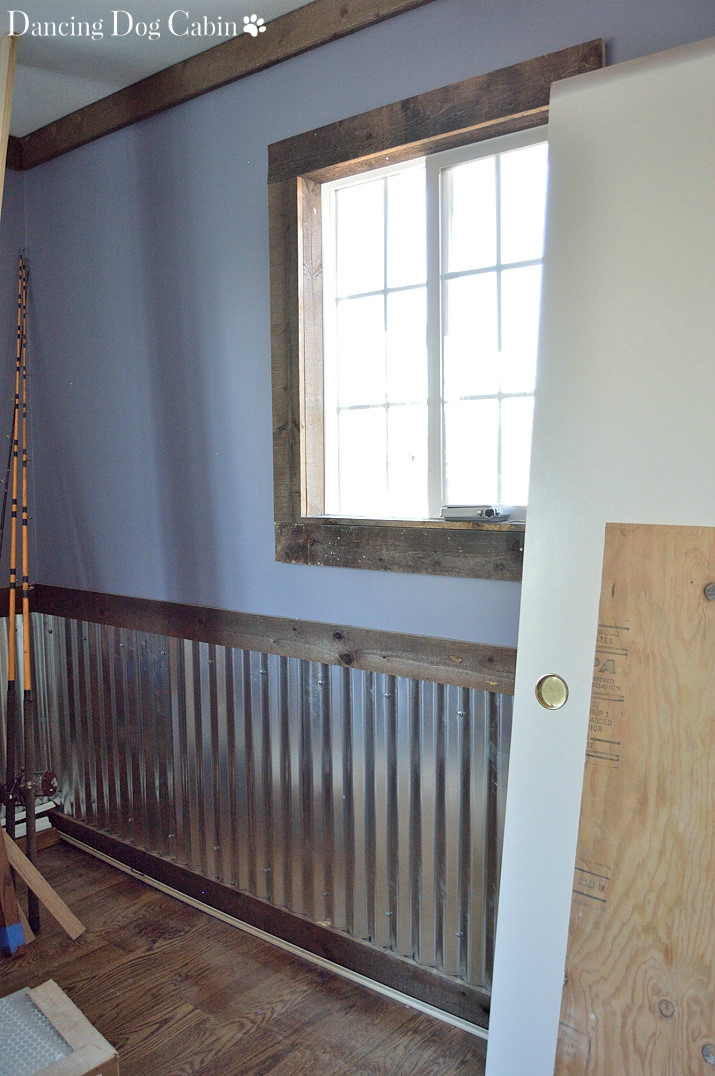
I've only been able to decorate the family room this year, since the rest of the house is completely discombobulated  by the ongoing renovation project.  It made it a little easier this year (I kept telling myself that)-- only one room to decorate. 

So...here is Christmas in our family room.  I wasn't able to share anything about Christmas last year, so I was especially determined to post something this year, even if it was just a little bit... 


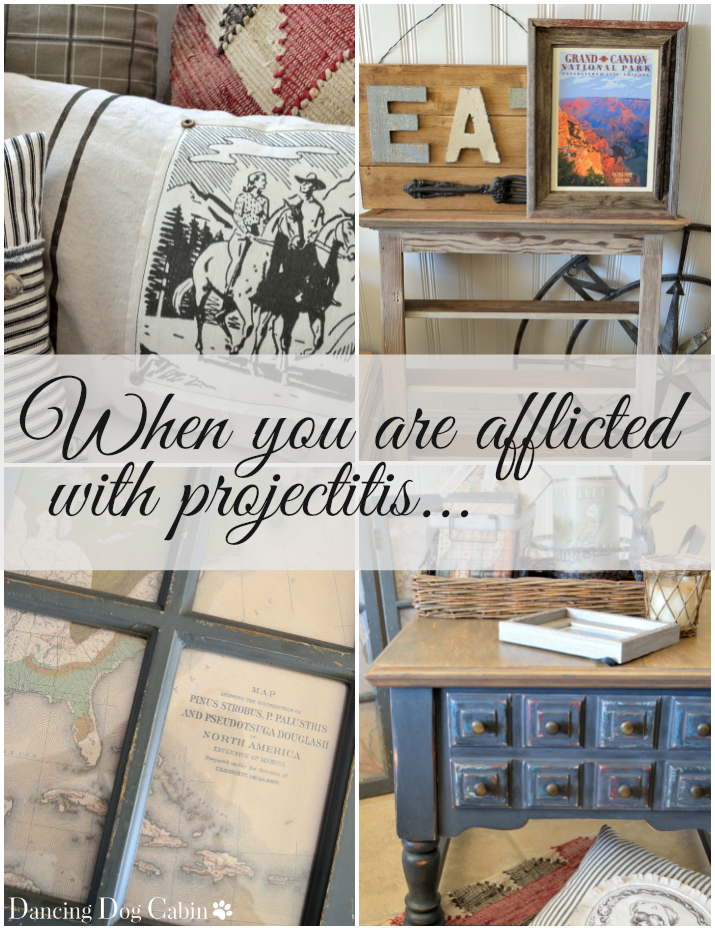
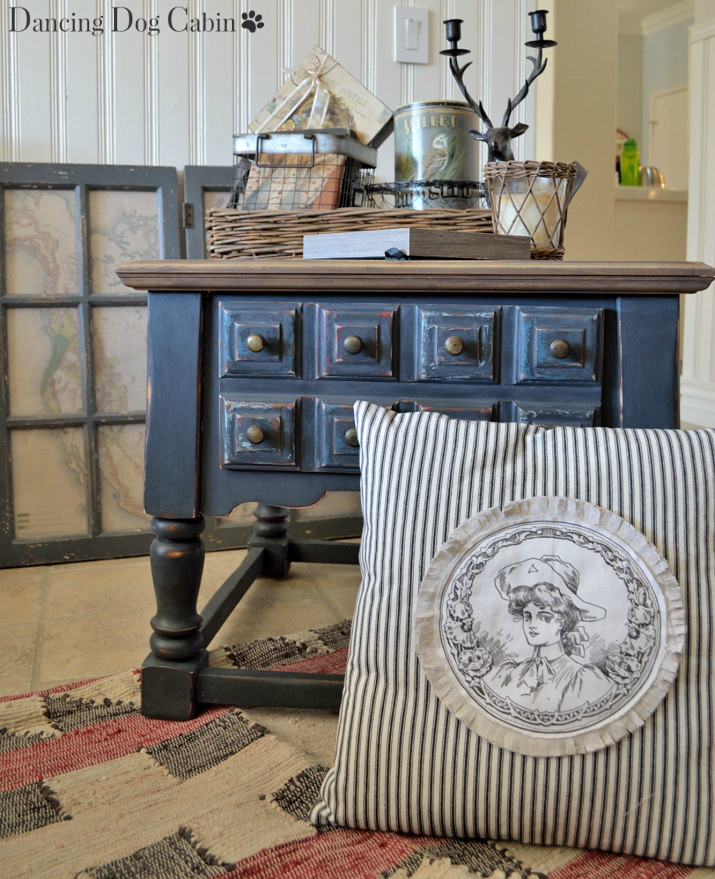
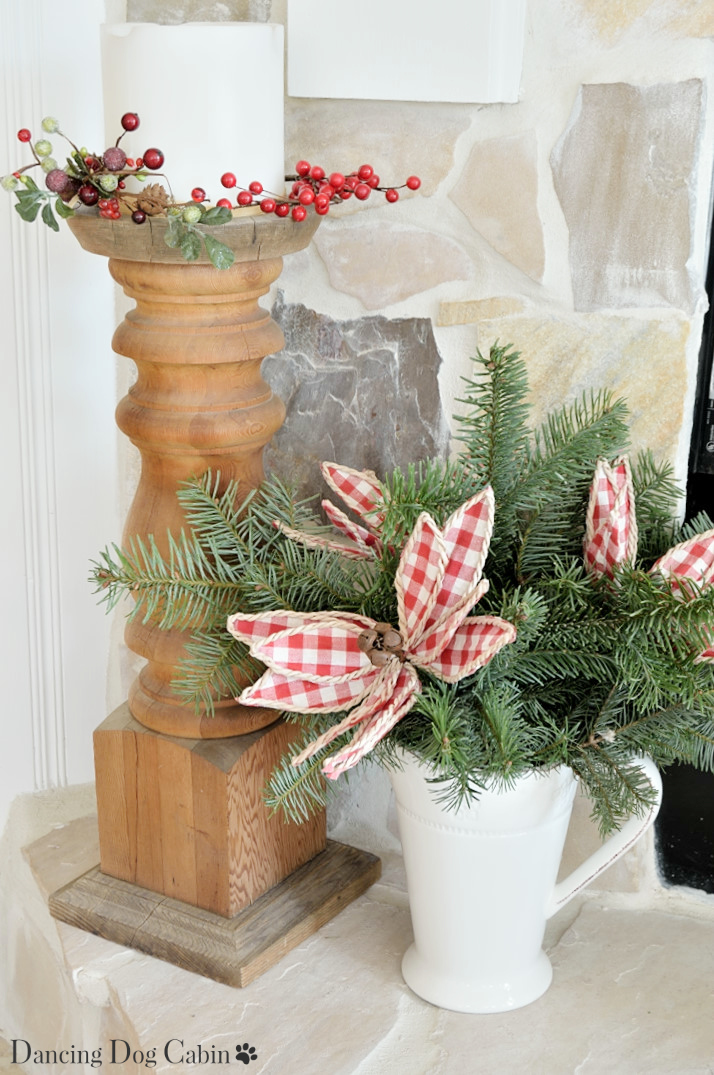
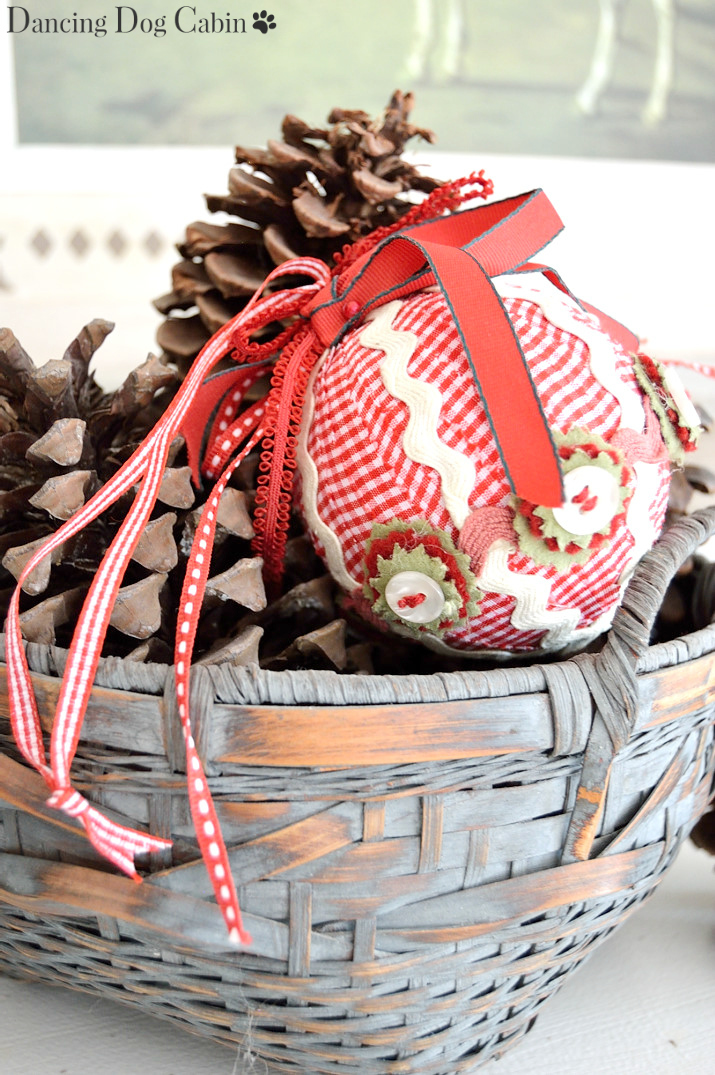
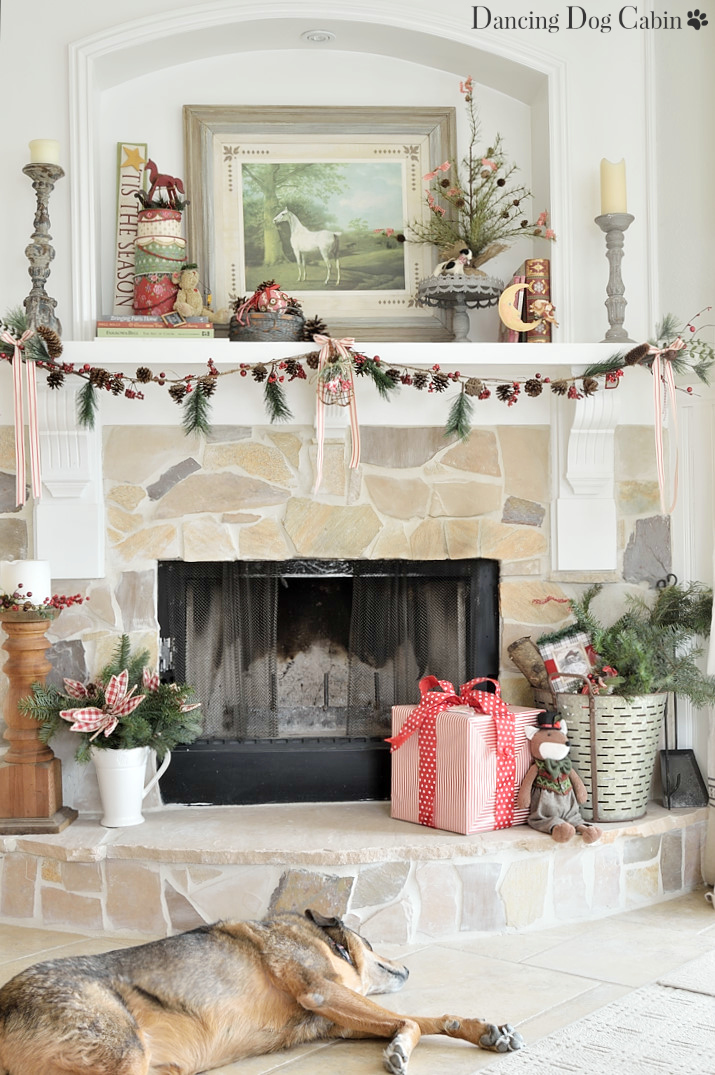
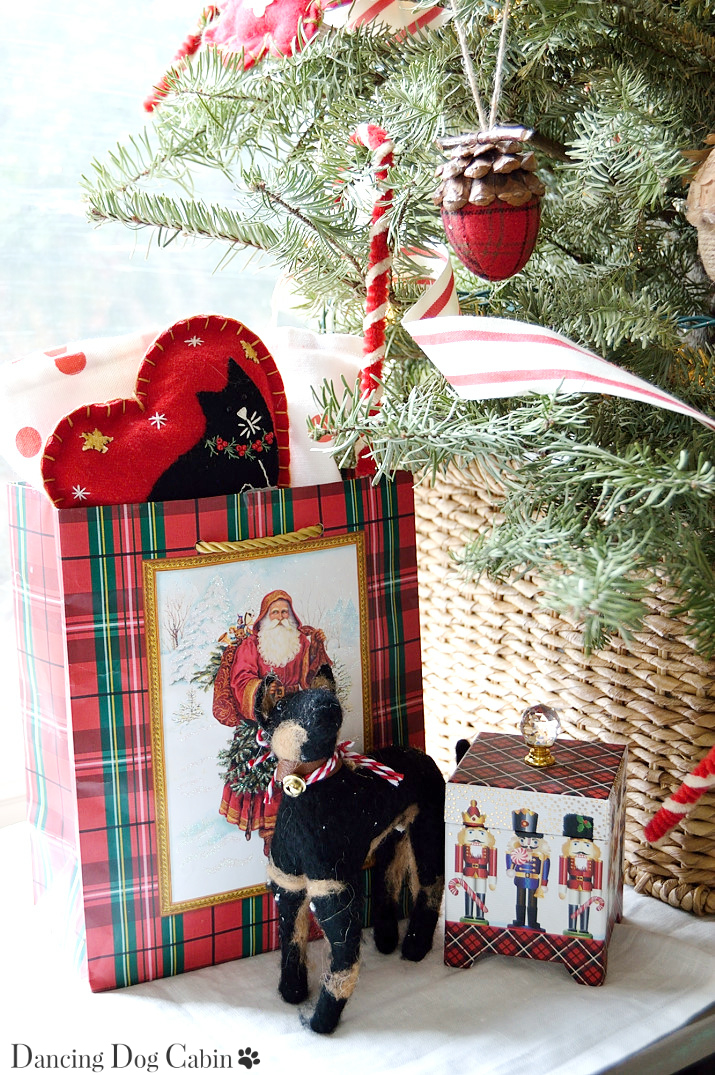
This is my chance to really break out all the red.  So cheery and Christmasy!  I don't think I could ever go with a 'blue' or 'green' color scheme. 


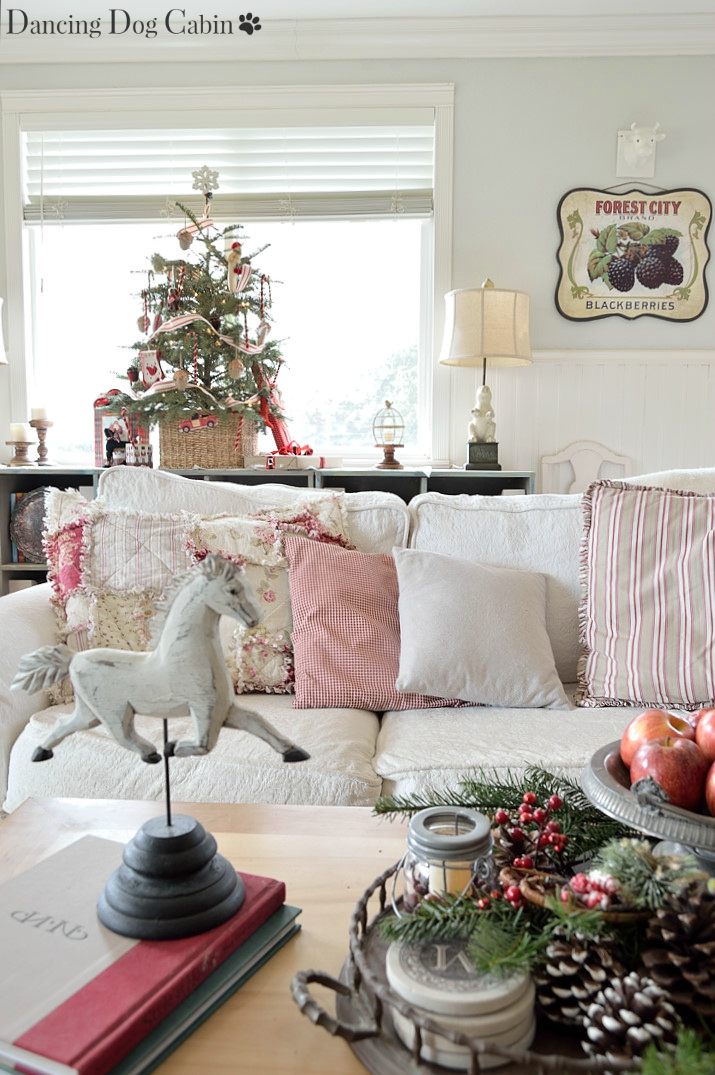
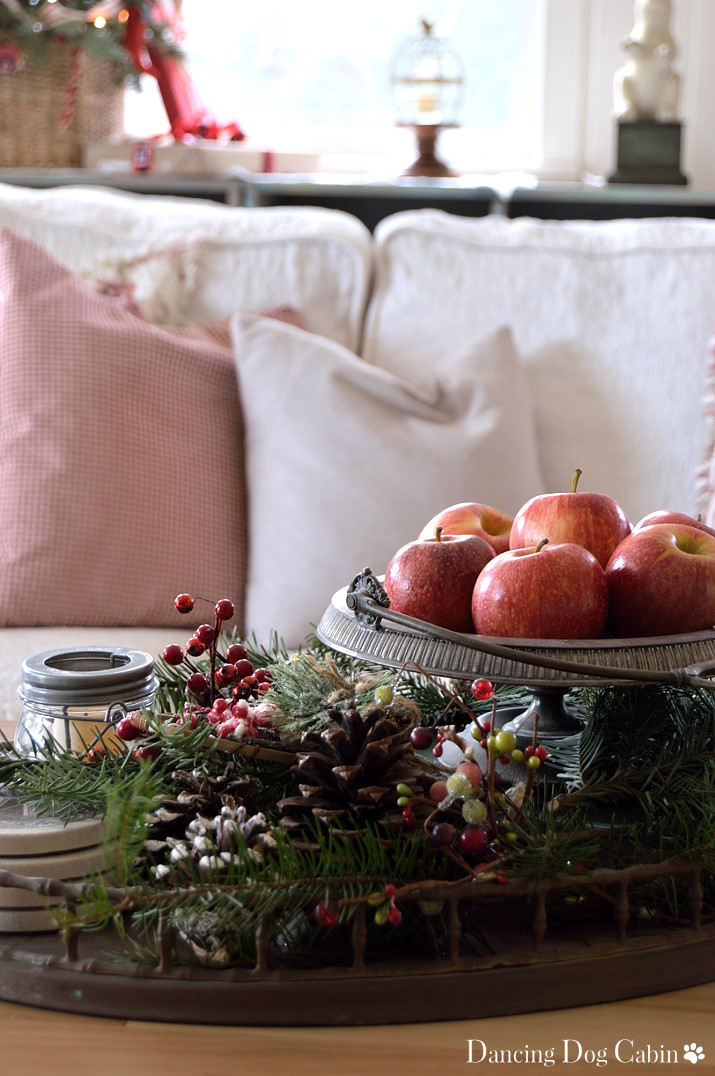
I went with a small Christmas tree this year.   And even at only about one week old, it's already dried out and drooping, thanks to the heat and winds that have plagued southern California over the past few weeks.  

Since we are so fortunate that we were not affected by the terrible fires that have raged (and still are as I write this) across the southern half of the state, I certainly won't complain about this very minor and inconsequential side effect of the horrible Santa Ana winds that just won't go away.


This year it was all about nostalgia and things that spoke to the little kid inside.  All my favorite little Christmas creatures and whimsical ornaments remind me of that magical, excited feeling I got every Christmas morning when I was little.  That feeling that impelled me to jump out of bed at around 5 am and wake everyone up!  (I'm happy to sleep in these days, no need to get up that early to open presents). 


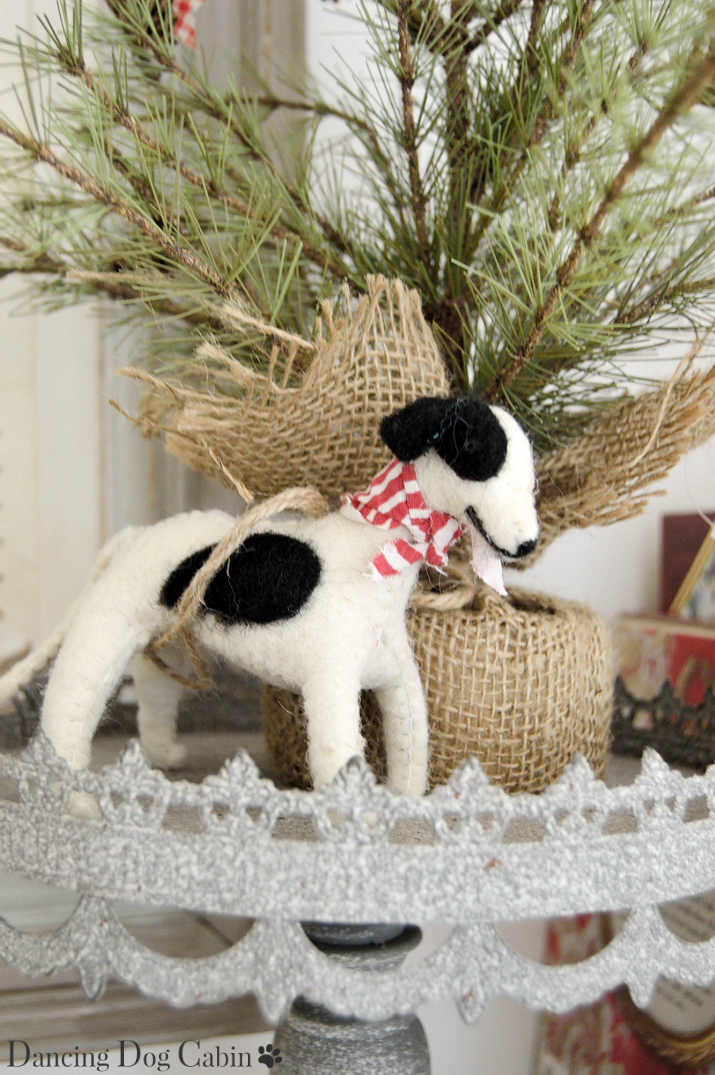
Update:  Is this a Blogging No-No?  I don't care-- I was in such a hurry when I wrote this post that I forgot to include my favorite Christmas doggy (after, of course, my real, live doggies). So here he is...


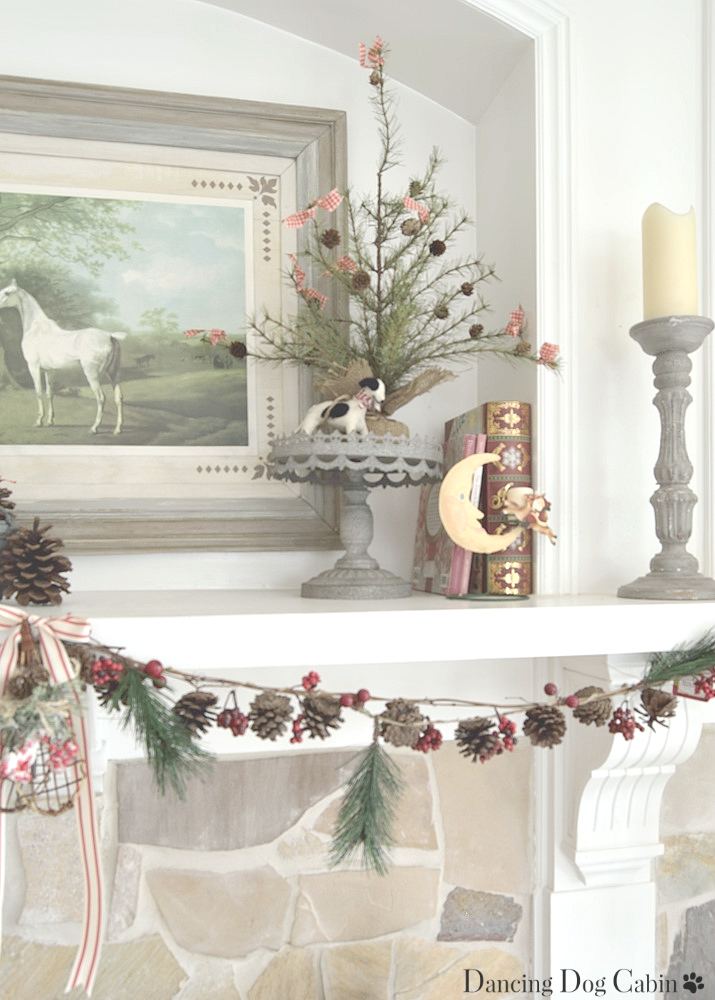
I always bring out Teddy Bear Angel from his box every year, no matter what.  My mom gave him to me, so he is especially dear to me.


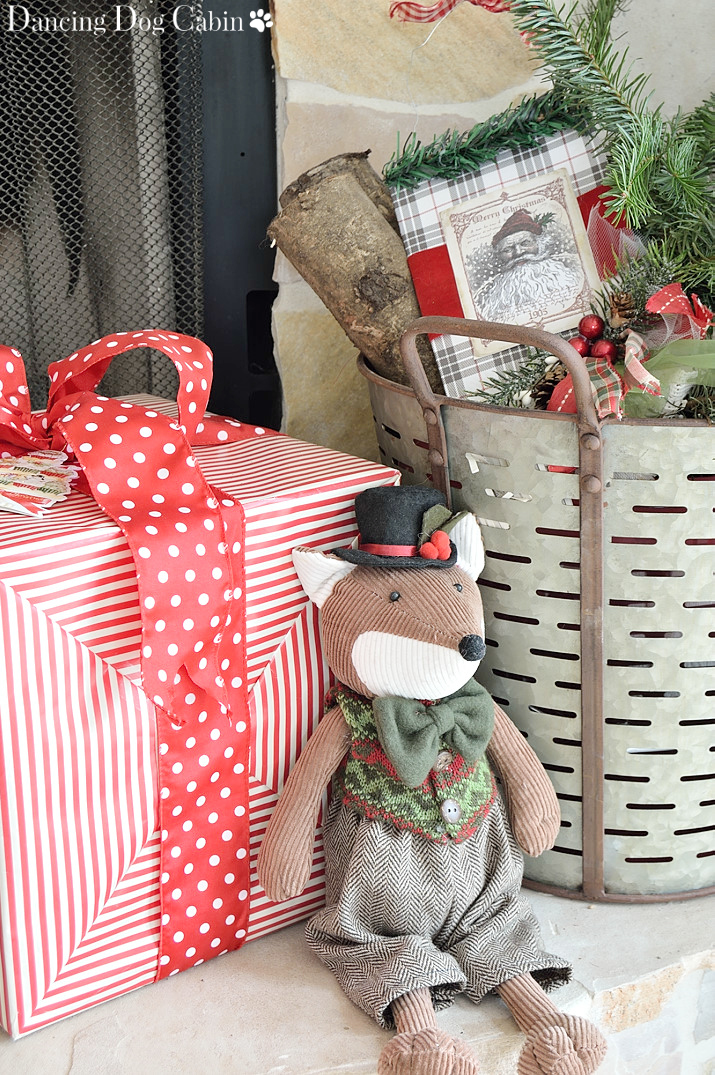
Mr. Foxy demanded that I take him home last year, and I agreed wholeheartedly.  I can never resist a cute animal of any sort and I loved this little guy's dapper outfit.  

Although it is risky to put him within reach of the dogs.  Especially right now: I had to hide their chew toys since Rosie must not play and romp about because of recent surgery, and she may be tempted by Mr. Foxy.  Sometimes they have a hard time distinguishing between their toys and mine ;-)


***

Wishing everyone a Merry Christmas and a prosperous, joyful New Year!


Thanks for visiting!


***


Most likely linking to the following this week....


Best of the Weekend at Ms. Toody Goo Shoes
Inspire Me Monday at My Uncommon Slice of Suburbia
Tablescape Thursday at Between Naps on the Porch
Share Your Cup Thursday at Have a Daily Cup of Mrs. Olson
Happiness is Homemade at Ducks 'N a Row
DIY Salvaged Junk Projects at Funky Junk Interiors


I was featured at:

A Rustic & Romantic Christmas at My Thrift Store Addiction

My Thrift Store Addiction Rustic & Romantic Creating Christmas party


Share Your Style at 21 Rosemary Lane


Sunday, November 26, 2017

When You Are Afflicted With Projectitis....


I'm seeing lots of 'reality' posts on various blogs these days. People admitting to not having immaculate homes 24/7, admitting that not every room is perfectly styled and ready for a Country Living magazine shoot  (What!!?, don't we all live like that??).  


I see photos with a bit of artful messiness here and there as evidence of real-life lives: a few toys scattered around on the floor, a couple dirty dishes on the coffee table, some one's shoes tossed randomly under the sofa.  


I'll start off by saying right away that this post isn't going to show that kind of reality.  Thanks to the multitude of projects that we have going on right now, including major renovations, my home is neither magazine ready nor is it even just discretely untidy here and there--it's just AWFUL everywhere.  


This is, of course, one of the reasons why I haven't posted in so long: too many projects consuming all my time and energy, plus some other things that demanded my attention, equal no spare time and a pretty messy looking home.


So, since I don't have much in the way of pretty pictures to share, this will be more of a battlefield-tour, with select, highly edited photos of the nitty-gritty that is my current reality and a few brief, explanatory sentences. 


Man Cave

Let's start with the man cave, which until recently, has been a storage room for all of the stuff we didn't have room for anywhere else.   We borrowed several design ideas from the cabin, including using galvanized metal (click here for more info on this) for the wainscoting and creating salvaged-looking wood for a feature wall and for the trim throughout (click here and here for more info on the wood 'aging' process).


We stopped at about 85% complete so that it could briefly revert to the Storage Room and the juggernaut that is my renovating husband could continue rolling inexorably forward with more upstairs projects, forcing me to make decisions about paint color.


Details such as clearing out all of the tools and other stuff, finishing the switch plates and cleaning up all the sawdust, plus adding manly-type furnishings, remain.  


Flooring and Re-finishing the Walls


This is why the Man Cave remains almost, but not quite done.  We need a place for the big saw that is used to cut the wood floor planks and store all the stuff from the other rooms that are getting wood floors and refinished walls, and the Man Cave is the biggest room on the second floor.  


And what I mean by 'refinished' walls is my husband sanding away the ugly texture that came with the house so that the final, painted surface is nice and smooth.  The end result is lovely but the process is horrible and messy, with super-fine dust getting everywhere.


This also means that I need to decide on final paint colors for the sanded walls and I'm pretty sure that trying to choose a paint color that we both like will break my brain.


A medley of the upstairs mess...


The Deconstructed Chairs

These ugly escapees from the '70s were a Craigslist find (the twin to the chair below is lurking out of frame in full tacky glory).  But what could be better for a furniture deconstruction project?  They were almost free at $20 for both and had no redeeming qualities that I wanted to preserve.  The only thing that convinced me to bring them home (very reluctantly) was their solid wood construction, high back and side wings that could remain exposed, and relatively simple, unadorned style.  


This is my first attempt at chair deconstruction (I'd spent a lot of time looking covetously at Restoration Hardware's very pricey deconstructed chairs, which is where the idea was born).  In my ignorance I had assumed that full chair destruction could be accomplished in just a few hours instead of the month and a half of hard labor it actually took me to remove the dreadful, smelly fabric and batting and millions of staples and to sand away the icky, speckled finish so dear to the hearts of 1970's furniture makers.

These chairs are part of the cabin collection and I will share more on the deconstruction journey and their final, 'after' appearance later on in a separate post (although you get a glimpse of one that is finished at the end of this post).


Window/Map Wall Art


Another Restoration Hardware-inspired brainwave. I was sauntering around their store discretely trying out the deconstructed chairs and cogitating about how I could replicate them for MUCH, MUCH less than Restoration Hardware prices (see above) when I spotted some vintage maps on the walls of one of their show rooms (the theme of this particular 'room'  seemed to be world-traveling-manly-man from circa 1932 whose taste runs to over-sized leather chesterfield sofas, chunky, rustic coffee tables, weathered looking globes, a few chrome accents here and there...).  I remembered some windows-as-photo-frames I'd seen at World Market and a light bulb went off in my head as I stood there channeling Indiana Jones.  


I'll share more on how I put all this together later in another post; it involves a poster-making website and some free, vintage map images.


Bath Towels

This is so mundane but I thought I would share it anyway.  I think I got this idea from Sarah Richardson back when she still graced HGTV-USA (why is she only on HGTV-Canada now? Who knows.   Sarah, please, please come back to us all here in the lower 48, especially now that Fixer Upper is going away...).


Anyways, back to the towels.  It's simple: I sewed on grosgrain loops so that they would hang on hooks and stay put.  I find towels hanging spread out on towel racks very messy looking and opted for a vintage-looking hook and rail thing I got at Hobby Lobby instead.  Instant tidiness.


You'll be seeing more of this when I reveal the cabin bathroom.


Pillows


It was a summer of pillows.  I'm a fabric junkie and grew up with a mom who sewed and made everything, so creating with my own two hands a custom collection of pillows that adequately expressed the right degree of cabin-ness was very important to me.  I did buy a couple  pillows when I couldn't stand the thought of one more sewing project.   


At least once a day my husband asked me if he needed to buy another container to haul all the pillows back to the cabin.  I think he is concerned that we will need to sleep outside because the bed and floors are covered with pillows...


I don't know what he is talking about...but I am looking forward to show you all my pillows in their proper place at the cabin. 


Coffee Table and Other Things

The next few photos show a random collection of various cabin-related furniture and accessories.


In it's former life, this coffee table started off as another 1970s piece.  I banished all semblance of '70s tackiness with some chalk paint and a gray-brown stain for the top. 


I've been collecting all sorts of cabin-related accessories and decor items over the years-- here they are sitting in our dining room, ready for packing and transport to the cabin.


I used painters drop cloth and black ticking fabric to create a shower curtain for the cabin bathroom. I then transferred, stenciled, and hand painted a message about how much it's going to cost to shower at our cabin...


Not all of my time has been spent on cabin or house related projects.

My family and I recently made a trip to Yosemite National Park to scatter my mom's ashes...


This gorgeously rustic bungalow was Jennie Curry's ('Mother Curry' of the Yosemite Park & Curry Company) home when she was still alive.  Don't you just want to go inside, sit down with a cup of hot cocoa and a good book and never, ever return to your daily grind of a life?


After the photo above of the divinely wonderful and rustic Mother Curry's Bungalow, it's entirely fitting to end this post with a sneak peak of our own little rustic cabin.  Yes, yes, YES it's finally, finally done and habitable in every sense of the word.  We just spent Thanksgiving there-- you can see our Thanksgiving Table below.


I will, of course, share more photos of the cabin over the next month or so as I work my way through all of the photos...


Thanks for visiting!


***


Most likely linking to the following this week....


Tablescape Thursday at Between Naps on the Porch
Bouquet of Talent at Life on Lakeshore Drive
DIY Salvaged Junk Projects at Funky Junk Interiors


Sunday, August 7, 2016

It's Time For Berry Shortcake


It's happened again. Summer has just rushed by and I'm already seeing back-to-school commercials on TV (and starting to dread impending back-to-school traffic on my daily commute).

But it's still blazing hot outside and the calendar does still say August... which means summer hasn't departed yet... which means easy fruit desserts are on my mind often.


A quick detour on the state of my mind with respect to dessert: I'm a total sugar addict and can't get through the day without thinking about eating and making some kind of yummy, decadent dessert. I know, you'd never know it by looking at my In The Kitchen page, which is sadly underpopulated. But I'm trying to watch what I eat and writing a lot of posts about desserts and dessert recipes means making (and eating) a lot of desserts. So, not so many dessert posts so far. How do food bloggers (especially those focused on desserts) do what they do and not gain a zillion pounds?


Anyway, back onto the topic of easy, summer desserts...and what is easier to throw together than berry shortcake?

All it takes is...

1. A quick and easy sweet biscuit
2. Berries of your choice with a little sugar
3. Sweetened and whipped cream.


I used strawberries and raspberries here. I would have used blackberries as well, for the extra bit of contrasting tartness and color, but the grocery store was out.


Since fruit desserts tend to get better if they sit at least 12 hours, I think it's a good idea to macerate the berries with sugar the day before. This allow flavors to meld and intensify, and if needed, you can add a little more sugar to taste the next day before you assemble the dessert and eat it.


I like to whip the cream until just the soft peak stage...


...so that it droops and drips very nicely around the berries and shortcake.


A yummy, crumbly shortcake adds just enough sweetness to complement the berries without competing with them.


***

Here is the recipe...

Berries

2 pints strawberries (hulled and sliced)
1 pint raspberries
1 pint blackberries
1/4 to 1/2 cup granulated sugar (or more, if needed)

Shortcake

2/3 cup (1 1/4 stick) ice-cold unsalted butter, cut into cubes
3 1/2 cup all-purpose flour
1/3 cup granulated sugar
2 tablespoons baking powder
1/2 teaspoon salt
2 large eggs
1/2 cup heavy whipping cream (plus extra for brushing)
1/2 cup buttermilk
turbinado sugar for dusting

Whipped Cream

2 cups heavy whipping cream
1/4 to 1/2 cup powdered sugar
1/4 to 1/2 teaspoon vanilla


Make the berry topping:

1. Combine the strawberries and sugar and toss gently. Let the berries sit for about 30 minutes until they release some of their juice and very gently stir in the other berries (be extra careful with the raspberries, which tend to fall apart easily). As I mention above, it's a good idea to prepare the berries one day in advance, since the flavor improves with age. Of course you can use whatever combination of berries you prefer (including blueberries). After the berry mixture has sat for at least 12 hours, you can adjust the sweetness by adding more sugar if needed. How much will depend on how sweet you like it, and how sweet and flavorful the berries were to begin with. 


Make the shortcake:

Pre-heat the oven to 350 degrees F.

1. Place a piece of parchment paper on top of two cookie sheets (or butter and flour each sheet)

2. Sift together the flour, 1/3 cup of sugar, baking powder, and salt. Add the 2/3 cup of butter. Using an electric mixer set at medium speed, mix together until the mixture is crumbly (up to 3 minutes). Add the eggs, one at a time, beating well after each addition. Gradually add the 1/2 cup of cream and 1/2 cup of butter milk, beating on low speed until the liquid is incorporated and the mixture is soft and thick (and not too wet).

3. Use a 4-oz ice-cream scoop to form each shortcake. Pack the mixture so that it is even with the top of the scoop and release onto the prepared cookie sheet. Each shortcake should be about 2 inches apart on the cookie sheet. Brush the heavy whipping cream onto the tops of the shortcakes and sprinkle with the turbinado sugar.

4. Bake the shortcakes until a light golden brown on top, about 20 to 25 minutes. Remove the shortcakes from the oven and allow to cool on the cookie sheets set on wire racks for 5 minutes. Transfer the shortcakes to the wire racks and allow to cool completely before assembling the berry shortcake desserts.


Make the sweetened whipping cream:

1. Place the 2 cups of heavy whipping cream in a chilled bowl and beat with an electric beater, starting on the low setting and gradually increasing the speed.

2. When the cream starts to thicken, gradually add the powdered sugar until the cream is sweet enough for your liking. Add the vanilla, Beat until the mixture just reaches the soft peak stage. Chill the whipped cream until you are ready to assemble the berry shortcakes.


Assemble:

1. Cut the shortcakes in half.

2. Placing the bottom half in a bowl, top with the berry mixture and a dollop of whipped cream

3, Place the top half of the shortcake on the berry/cream mixture, top with another scoop of berries and another spoonful of whipped cream


The shortcakes can be stored at room temperature for a couple days in a plastic storage bag. The berry mixture and whipped cream should be stored in an airtight container in the refrigerator.

***

Thanks for visiting!


***


Most likely linking to the following this week....


That DIY Party at DIY Showoff


Tablescape Thursday at Between Naps on the Porch


Vintage Charm Party at My Thrift Store Addiction and Charm Bracelet Diva


Five Star Frou-Frou at a Tray of Bliss


***

I was featured at:

Amaze Me Monday #176 at Dwellings The Heart of Your Home


Best of the Weekend at Hello Little Home and Little Miss Celebration


Bouquet of Talent #207 at Life on Lakeshore Drive