I don't know what to call it. A console? A buffet? A sideboard? In its former life, before I transformed it, it was a large dresser. I guess it still is, but with a new look and purpose.
Its been about a year since I dragged this big beast home. I nearly broke my back trying to get it into the house. Literally. As I tried to lift it, I heard an ominous cracking sound in my lower back. Oh, no, bad idea, I thought. Here come more visits to the orthopedic doctor (who will barley spend 2 minutes with me), and then on to the physical therapist....
Anyway, I managed to drag it and push it into our front hall with the help of those wonderful little furniture moving disks and pads (those things with either plastic or felted surfaces for easily moving big, heavy furniture around on carpeting and hard-surface floors).
And then I collapsed on the couch with a heating pad and some ibuprofen, leaving Big Beast for another day.

Before Beast, I had a small side table (really, it's a small desk) at this location as a sort of placeholder until something better came along. It was too small and dinky for the space, and had hardly any storage, but it at least provided some kind of focal point at the end of this room.
Christmas decorations figure prominently at this end of the living room every December since our Christmas tree always goes in the corner at this end of the living room. A bigger piece of furniture would only mean more Yuletide joy at this end of the room.

About a year and a half ago I finally got tired of Small Desk's underwhelming performance in the living room and got serious about finding a suitably large buffet or console with a lot of storage. I did all the things everyone does when looking for a furniture project: I scoured local antique malls and consignment shops, visited many garage sales, and spent hours scrolling through Craigslist. Hours and hours. You have to spend a lot of time sifting through some pretty ugly and uninspiring stuff before finding anything worthwhile on Craigslist. Patience and doggedness is key.
After several months of tedious searching, I finally found something that ticked all the boxes.
- Right size (length x height x width)
- Right amount of detail without being over-the-top fancy or formal
- Lots of storage, including drawers that opened easily
- Quality workmanship
- Close to my home
- Right price
The dark, shiny finish didn't bother me at all, since I planned to transform it with paint. This guy also had the big, chunky presence I felt was necessary to anchor the far end of our rather long and narrow living room. And I just loved the feet; they had the right amount of curvy flourishes without being too feminine.
It is certainly well made-- remember my cracking back? Heavy furniture is well made furniture, they say. Plus all the drawers have dove-tail joints, another sign of quality craftsmanship.

The transformation consisted of:
- Sanding
- Staining the top
- Painting the sides and drawers
- Spray painting the drawer hardware
- 'Aging' the entire piece (read more sanding)
Materials and tools that I used:
- Annie Sloan Pure White chalk paint and clear wax
- Minwax Dark Walnut wood stain
- Rust-Oleum oil rubbed bronze spray paint
- Palm sander
- Coarse, medium, and fine grit sandpaper (80, 180, and 280 grit)
- Lots of elbow grease
***
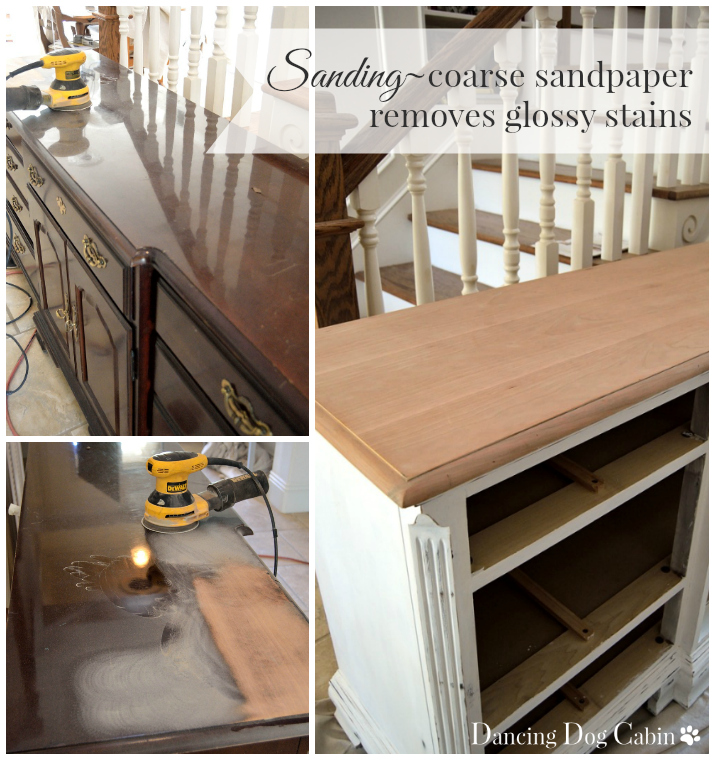
I started off by sanding, sanding, and yet more sanding with both a palm sander and by hand to dull down and scuff up that very shiny, dark cherry finish. All those nooks and crannies, the fluted corner, and the feet look wonderful when painted but are a huge pain to sand, since all those finicky little details must be sanded by hand.
The top was extra shiny; in fact, when I first saw it, I thought it had a glass top. I didn't remove all of the stain from the sides and drawers, just enough to prepare the surface to take the paint, but I removed it completely from the top, since I planned on staining the top.
Staining the top with Minwax Dark Walnut. I wanted to keep Big Beast on the rustic side of things and decided a natural wood finish on the top would offset all that white paint very nicely.
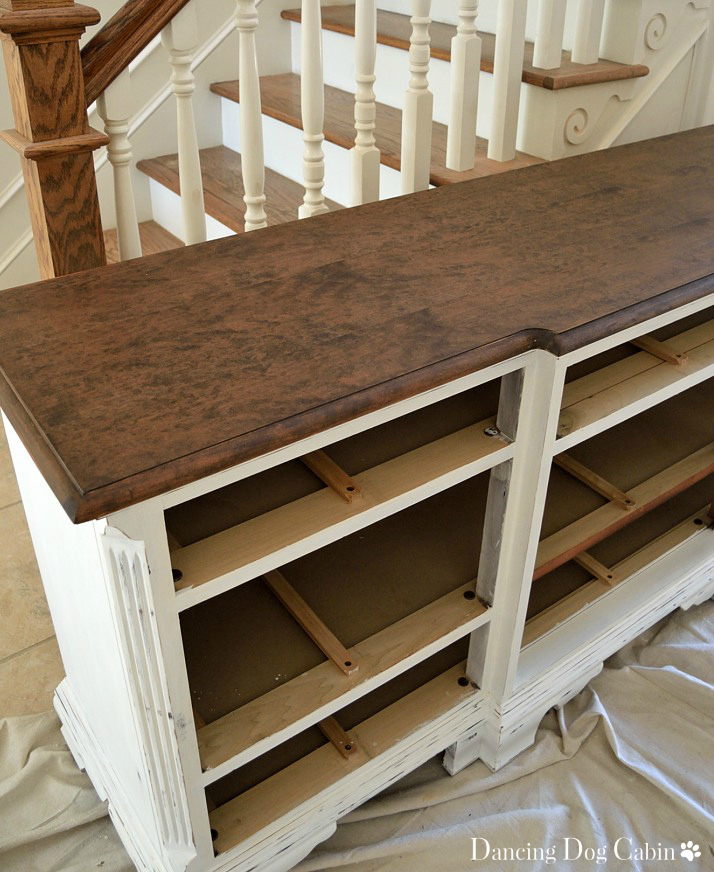
Dark Walnut was too dark and new looking, however, so I got out the sander and roughed it up to give it a distressed, aged look. While I used a very coarse, 80 grit sandpaper to remove the original stain, I used a medium, 120 grit sandpaper to knock back the Dark Walnut for a distressed appearance.
I finished it with a fine grit (220) sandpaper to give it a satiny-smooth surface and used a matte polyurethane to give it some protection, with no shine.
Much better, yes? This is more in line with the chippy, aged result I was after.

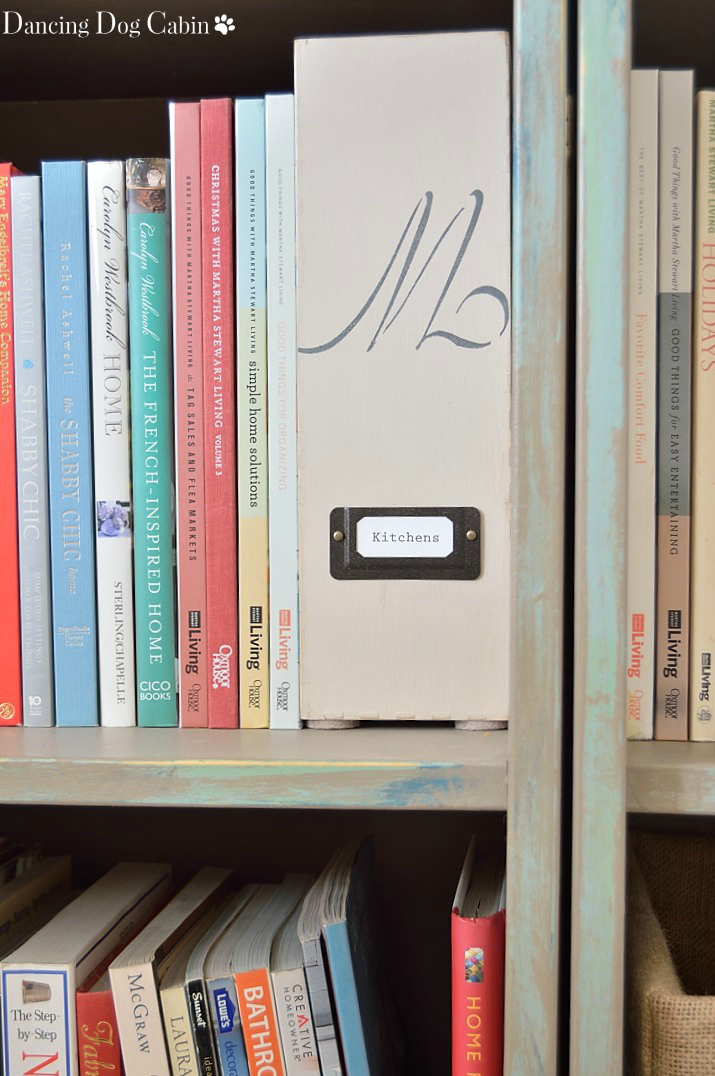
I painted it with Annie Sloan Pure White chalk paint. I know the product info says that you don't need to do any prep prior to painting, but as I found out with this Ikea bookcase upcycle project, this isn't exactly true. With slick, high gloss finishes, you really do need to rough it up a bit if you want the paint to stick (thus I sanded this thing until my hands were ready to fall off, as noted above).
I also removed all the hardware and spray painted each piece with Rust-oleum oil rubbed bronze spray paint. Instant vintage character; no more brash, brassy finish. This is a great way to re-use the drawer pulls that come with an old piece of furniture. If you like the basic hardware, but don't care for the for the finish, just spray with metallic spray paint in the color and finish of your choice.

Last step: aging and 'rusticating' the piece with yet more sanding. I knocked off some of the paint from the edges of the drawers and other strategic areas by hand and with the sander; I used medium and fine grit sandpaper for this step.
A little bit of sanding highlights the edges and decorative details very nicely, especially important for furniture that is painted white.
A little bit of sanding highlights the edges and decorative details very nicely, especially important for furniture that is painted white.

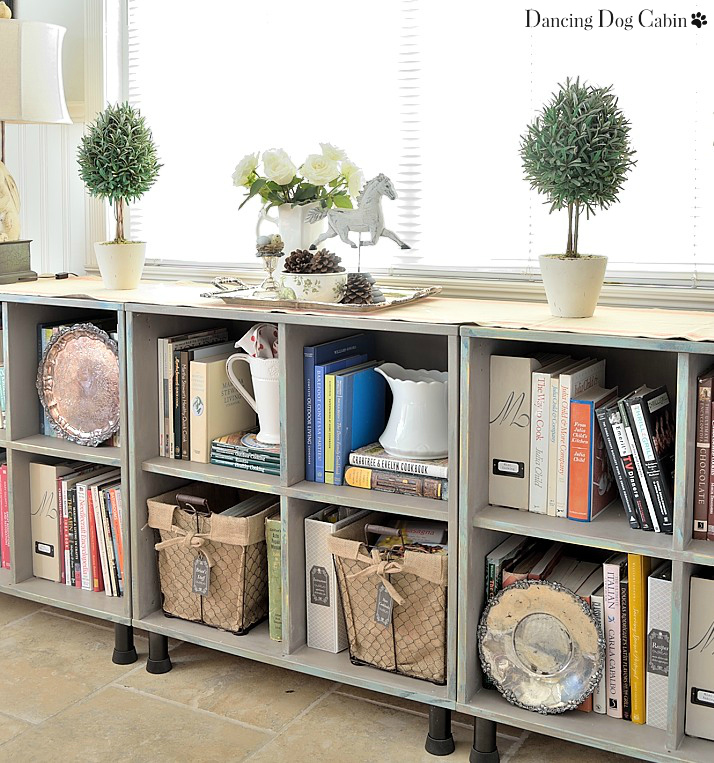
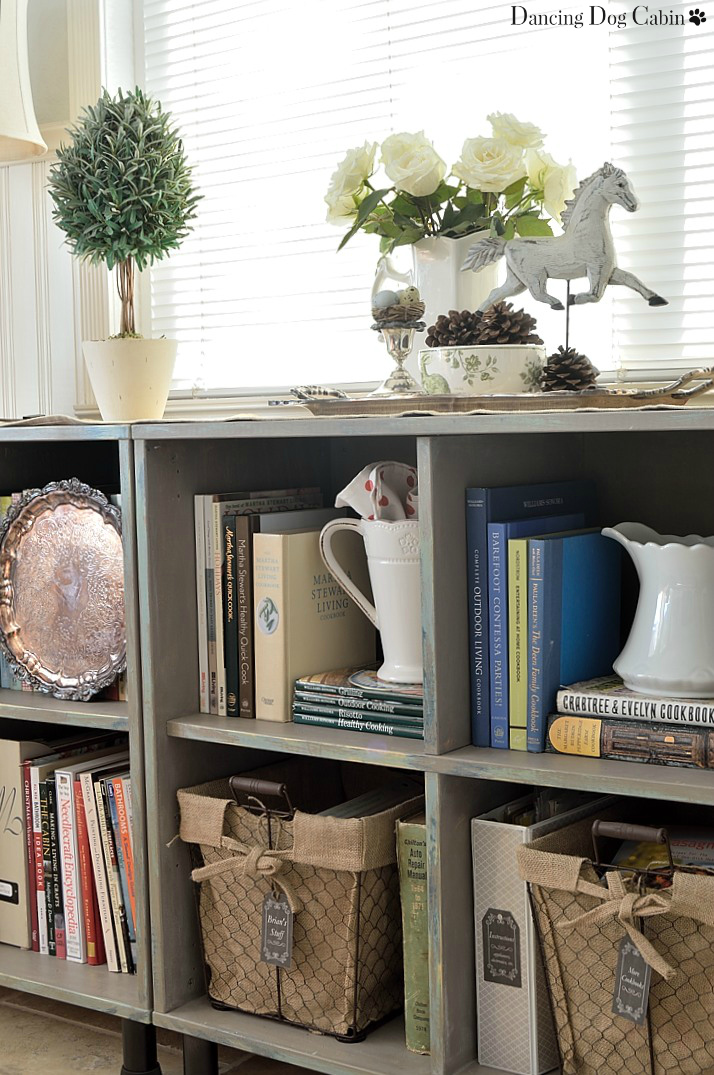
Did I mention it has great storage? More roomy drawers hide behind those doors.


Key take-aways here:
- Get someone to help move large pieces of furniture
- Some sanding will be necessary if the original finish is high gloss (even with chalk paint)
- Spray painting original hardware is a great way to save some money (if you like the drawer pulls that came with the piece)
***
Near future posts will include another long-standing project: the horse wall-art piece...

Thanks for visiting!
***
Most likely linking to the following this week....
Inspire Me Monday at My Uncommon Slice of Suburbia
Tablescape Thursday at Between Naps on the Porch
Bouquet of Talent at Life on Lakeshore Drive
Party in Your PJs at the Cookie Puzzle
Home Sweet Home at The Charm of Home
Five Star Frou-Frou at a Tray of Bliss
Share It One More Time at Everyday Home Blog