
It's been a while since I posted anything about the cabin, so I thought I would provide an update on our progress. I'll say this, this whole project has been a total science experiment for both my husband and I, where the things we got right, as well as our mistakes, are nicely showcased for the world to see. It's been a new experience with a steep learning curve, where we quickly learned what worked and what didn't, what to do and what not to do the next time around when we tackle the larger 'main' house (if we are ever able to figure out how that gets paid for).

This has been DIY (well, almost DIY) kicked up several notches for both me and my husband, because I ended designing and creating the final plans used to build the cabin, with much input from my husband regarding what was to code, structural requirements I had to pay attention to, layout, and so on. So, before I jump into showing the cabin construction process, I'll give a little background on the design and planning, and how we ended up doing it all....

Right around the time we closed on the property, I started to sketch plan views and floor plans on graph paper, but that was too cumbersome, too difficult to modify and tweak. Then I downloaded SketchUp, but that didn't give me the rendering capabilities I decided I really needed. So I did a little online research, and settled on Home Designer Suite because it seemed to offer great 3-D rendering capabilities, an extensive library of symbols for furniture, fixtures, appliances, etc.-- which I really wanted so that I could play around with the floorplan.

And then somewhere along the line, when I was creating multiple versions of the same tiny little cabin, trying to figure out the baffling stair design function, experimenting with rooflines with crazy dormers sticking out at odd angles (it took me a while to get the hang of some of the program elements), my husband and I decided that I could create the construction plans needed to apply for our building permit. Me. Not an architect or professional drafter.

After all, how hard could it be to design a simple little box? My husband is good at building stuff, knew how things went together, and was fairly familiar the Uniform Building Code, plus our plan at that time was for him to build everything, so he could fix any mistakes as he went along (see below for how that changes). We had successfully planned, designed, and executed several home improvement projects. It wasn't as if we were planning a complex structure cantilevered out over a cliff.

With that momentous decision, I realized I had to upgrade to Home Designer Pro which offered full dimensioning capabilities and the ability to create final, construction level drawings with detailed plan views, framing sections, elevations, and so on--- all things that we needed in order to submit our application for a building permit. I figured we would have spent a lot more if we had bought ready-to-go construction level plans from one of those cabin design companies or hired an architect, so I took the plunge and bought it. And wow, did I have fun with it!

If you ever have a hankering to design your own little get-away cabin or cottage, I highly recommend Chief Architect's Home Designer Pro (click here for more detail on this program). It's a CAD ('Computer Aided Design') based software program that can be used by non-architects and people that don't know anything about CAD (that's me!). You do need to take the time to go through all of the tutorials so that you can use the program properly and with a minimum of hair-tearing-out-frustration.

If you are leery about designing your own final house plans (or required to have architect-stamped plans), you can always purchase the cheaper Home Designer Suite (click here for more information on this program), have the fun of designing and customizing your own cabin, cottage, or house, and then send the files to a professional architect with compatible software who can fix any amateur boo-boos (yes, I had couple, as you will see later on) and then produce final construction drawings.

Note this is not a sponsored post, I just happen to be pretty satisfied with this software program and found that it did almost exactly what I needed it to do. There are a number of other home design software programs out there geared to the DIY enthusiast; this website provides a good comparison and overall rating of the most popular programs. Note these programs are also great for interior renovation and decorating projects.

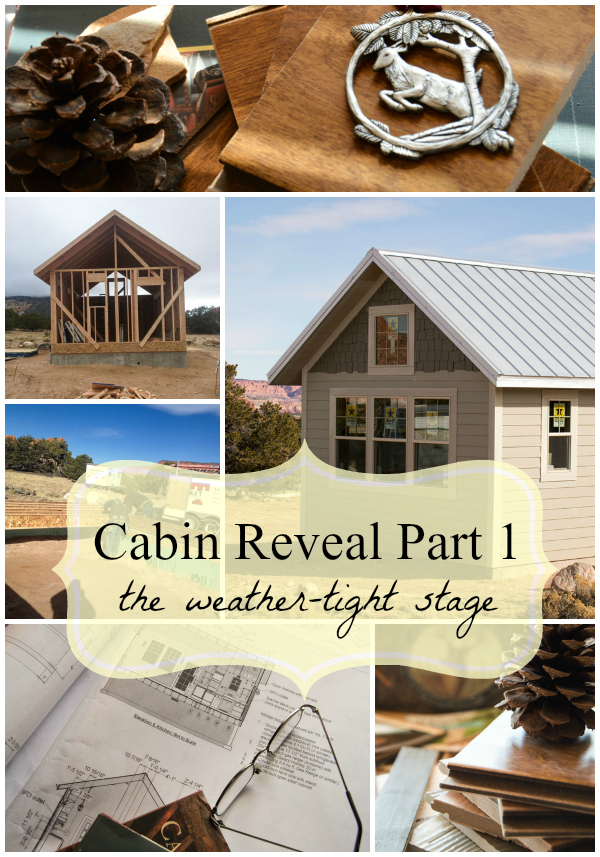
We had initially planned on my husband doing almost all of the work to save money and for the sheer satisfaction of completing a project like this ourselves...but that ended up being impossible (couldn't take that much time off). So we hired a contractor last fall to build the cabin to the 'weather-tight' stage-- foundation, framing, siding, and roof-- which he just finished a few weeks ago. We drove out there to look it over and talk about the next steps So....here is what has been accomplished so far.
Foundation wall and footing excavation was the first order of business. Too bad we didn't discover the legendary, lost bank robbery loot supposedly buried somewhere in southwestern Utah by Butch Cassidy and his gang, the Wild Bunch. Or maybe our contractor found it and didn't tell us!

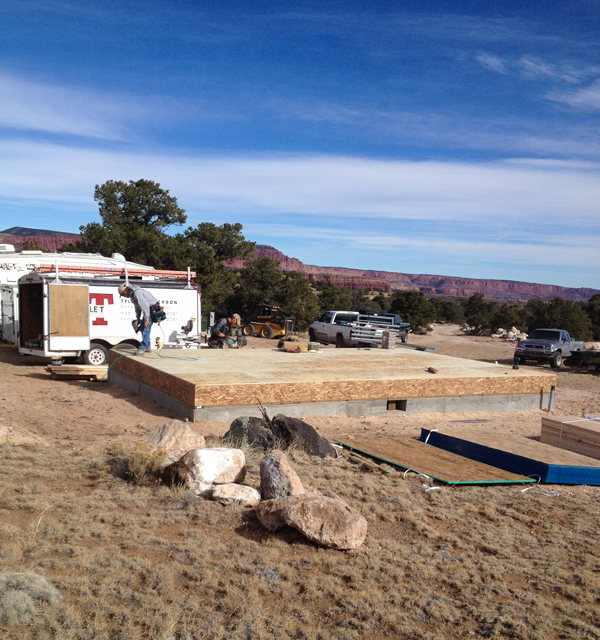
Next came pouring the foundation walls and footing and setting in the re-bar. That block of dirt you see in the center will cause us problems later on.... not enough got removed, which will reduce the clearance in the crawl space (for installing radiant heating in the subfloor, installing the hot water heater...). This is one of the pitfalls of doing this kind of thing long distance and relying on photos, texts, and emails. Things like this slip through the cracks......

Installing the floor joists under an intense blue sky. See that little trailer in the background? That's the 'canned ham' that came along with our property at the insistence of the previous owners (this was actually included in our purchase agreement-- I guess they really didn't want to deal with hauling it off). I see this as a fun, future project. I'll 'glamp' it up and turn it into a cute little guest room...some day. It will need to be moved, however, since it is right in the middle of one of our best views.

Finishing touches to the subfloor on a brilliant November day. It looks beautiful and sunny there, but it was probably freezing cold (or at least 'freezing' for my southern California blood).
This where the difficulties of having a construction project going on in another state truly hit home. When our contractor sent the next two photos I realized the windows and doors were wrong on the south and west walls.

This is the one problem I had with Home Designer Pro; it does not allow you to create a framing elevation view from the outside (you can probably do this if you upgrade to their professional series, but I wasn't about to spend that much money). You can only create a framing section that is viewed from the inside. Our contractor assumed that the view of the framing sections in the plans was from the outside looking in (should have put a note on the plans indicating the viewpoint), which resulted in the incorrect placement of some of the windows.... what you see below is a mirror image of what window placement should be. Luckily I caught it when looking at some of the photos our contractor sent to me.... at this stage, it was an easy fix.

Why is the house-wrap upside down? Who knows. It doesn't really matter, but we couldn't help wondering anyway.

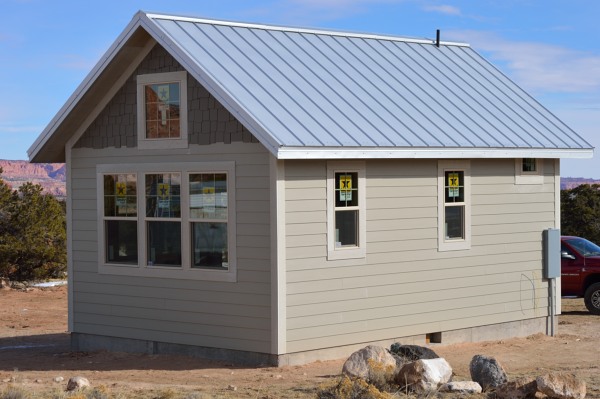
This is where we started to get excited. Once the siding started to go on, it finally started to look like the little cabin we had envisioned.

This is where I also noticed another mis-step in my design. I neglected to finish off the edge between the shingles and the ship lap. Fixing it is an additional piece of work that we've asked the contractor to do.

Ta-da! We have a little house at last......
...this is where we step in and finish it outside and in....paint the trim on the outside, face the foundation wall with stone, install septic system, install insulation, finish plumbing, finish walls, install flooring, install a deck and stairs, install fixtures....a long list.

I've boarded Melissa's crazy paint train....as I write this, I have dozens of little paint sample containers sitting on my dining room table. Trying to find the perfect colors for those finishing touches on the outside (for more on the original inspiration for colors for our cabin, please see this post). I'll have more on how the exterior gets finished in future posts, but this is what we are thinking of for now......

It has been enormously satisfying and rewarding to plan and design this project and then see it come to life-- if you are willing to take on something a little risky and scary, I highly recommend it. Our goals consisted of building a little 'vacation' cabin in compliance with our water permit requirement for building a residence within a specific timeframe that could ultimately become a guest room or cabin for a larger, future house......

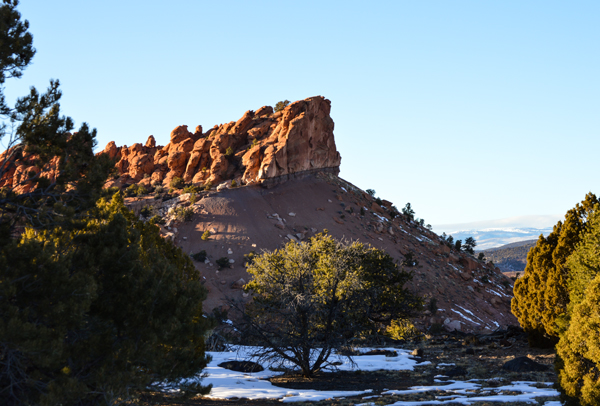
....maximize the amazing near- and distant views.....


...and do it all as inexpensively as possible, while still ending up with something that was highly customized and personal.

Linking to:
The Scoop # 156 at Cedar Hill Farmhouse
That DIY Party at DIY Show Off
What We Have Accomplished Wednesdays #71 at Green Willow Pond
at Savvy Southern Style
at French Country Cottage


What an exciting project! Well done, the cabin looks adorable, and the views are breathtaking!
ReplyThank you so much for your nice input!
Hi Melissa. Thanks for visiting my blog and leaving the nice comment about Tim and Leslie's cottage. You and your husband have taken on quite a project, and have come a long way. Your cabin is cute, and I agree with Magali: the views are breathtaking. I'm looking forward to Part 2 of your cabin reveal. All the best ~ Nancy
ReplyNancy, thank you for your nice comment! I'm looking forward to sharing more about the cabin as we complete the next few stages.
It's a lovely little cabin! I can't wait to see the inside. Waking up to those stunning views every morning will be awesome! Thank you for sharing it at What We Accomplished Wednesdays. Have a great week!
ReplyBlessings, Deborah
Thank you Deborah! And thank you for hosting a link up party!
ReplyWow...so cool...bless you for being Able to do all that work. It looks very remote, how far from a store, ect..for supplies?? Also, are there scary animals, (ha!!)...such as mountain lions, bear..ect..that you have to watch out for...if you were cooking outside for instance..or taking a scenic stroll?? Hopefully this doesn't sound incredibly stupid.....
ReplyWe are roughly 15 minutes from several little towns (with stores, hardware stores, etc). We do have mountain lions in the area and there are likely bears (probably black bears) in the nearby mountains. The chances of seeing a mountain lion are fairly low, however I try to hike with my husband and/or with my dogs. Black bears are generally not a threat to people as long as you keep your distance.
Oh my goodness, this brought back memories. We built our own house in much the same way as you, and with similar (ahem) learning experiences. Probably the hardest thing we ever did but also the most rewarding. All my research emphasized it was not a good idea to build your own house and boy, did I ever learn why that was true. But with lots of blood, sweat and tears we accomplished the nearly impossible and lived to tell about it. LOL I applaud your efforts. You have a beautiful little cabin and can't wait to see more. You should be proud!!!! (High fives!)
ReplyAnneMarie, thank you so much! This has been such a fun and rewarding (and challenging) project so far, and I know it will continue to be. It might have been wiser, and certainly easier (but more expensive) to have someone else design it and complete all construction work, but we would have missed out on a great learning experience.